Showing posts with label Food. Show all posts

Monday, February 24, 2014

Baking Sunday: Molten Lava Chocolate Cakes For a Crowd

Today I made myself work out before blogging. I suggest working out before reading this post because this Baking Sunday is a good one, especially if you're a chocolate lover. Ladies and Gentlemen, I present to you Molten Lava Cakes courtesy of Master Chef, Whitney Miller!

Jenny and I enjoyed making these. The trick to these are baking them for a short period of time so the outside gets done and the inside middle stays liquid-y chocolate. They are delicious with a dollop of homemade whipped cream and these are so easy to make! Miller suggest baking them in a muffin pan. So if you are ever in need an easy dessert that's impressive, for 12 people or under, these are definitely go-to and are sure to please.

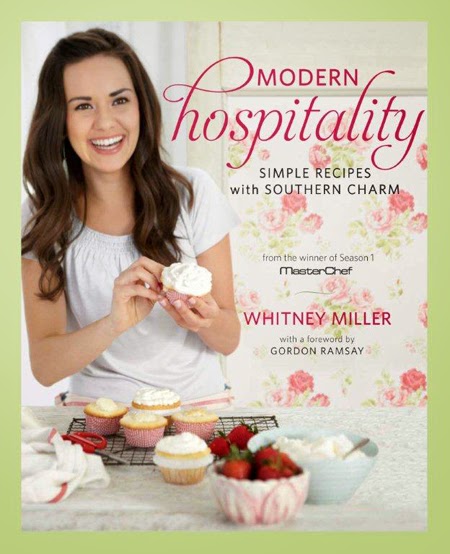
Last of all, my journey with Whitney Miller's cook book has been a fun one. I found her book while perusing through the cooking section at Half Price Books in Dallas this past summer (one of my favorite pastimes). I was originally attracted to the title of her cook book, "Modern Hospitality." Then, when I started looking through it, I became so intrigued! I thought to myself, "These are recipes that I would actually cook." So, I bought the book and have loved it dearly ever since. (Then, I watched her season of Master Chef. Thanks, YouTube). Miller's cook book features various updated versions of southern classics, she is a Mississippi girl after all, and I love that she learned to cook from her mother, grandmothers and great-grandmothers. We also discovered that her and Jenny attended the same college. Jenny is a Mississippi girl, too. I just love these southern belles.

Now for the REALLY exciting part: Saturday night, I tweeted about being excited to make the molten lava cakes with Jenny and tagged Miller in my tweet. Sunday, while Jenny and I were baking, she tweeted me back! I was SO excited. It's just kind of fun to have a Master Chef tweet you, you know? I sent her a picture of our final product and she said, "They look great!" :). So, these have the Master Chef's approval. Anyway, enough excitement. Enjoy the recipe, won't you? And grab a copy of Miller's cookbook if you have the chance. You won't be disappointed!


Molten Lava Cakes for a Crowd (Master Chef, Whitney Miller)
 *This recipe is taken straight from her cook book! No alterations.
Serves 12
WHIPPED CREAM:
  • 1 cup heavy cream, cold
  • 2 1/2 tablespoons confectioners' sugar
CAKES:
  • 1 cup dark chocolate chips
  • 1 stick plus 2 tablespoons (5 ounces) unsalted butter (salted will work if that's all you have)
  • 2 tablespoons brewed coffee
  • 1/2 cup all-purpose flour
  • 1 1/2 cups confectioners' sugar
  • 3 large eggs, lightly beaten
  • 3 large egg yolks, lightly beaten
  • 1 teaspoon pure vanilla extract
  • 2 tablespoons unsweetened cocoa powder
Preheat the oven to 400°F. Lightly coat a 12-cup muffin tin with cooking spray.

To make the whipped cream: Beat the cream using an electric mixer in a large cold bowl until soft peaks form. Gradually beat in 2 tablespoons of the confectioner' sugar. Cover and refrigerate while you make the cakes.

To make the cakes: Melt the chocolate chips and butter in a medium saucepan over low heat, stirring frequently. Once the chocolate and butter are melted, stir in the coffee until smooth.

In a medium bowl, sift together the flour and confectioners' sugar. Stir in the chocolate mixture. Add the whole eggs and egg yolks one at a time, beating well after each addition. Stir in the vanilla.

Divide the batter evenly among the muffin cups. Bake until the cakes are slightly jiggly in the center, about 7 minutes. Run a butter knife around the edges of each cake and transfer the hot cakes to dessert plates. Top with a dollop of whipped cream and dust with the cocoa powder.
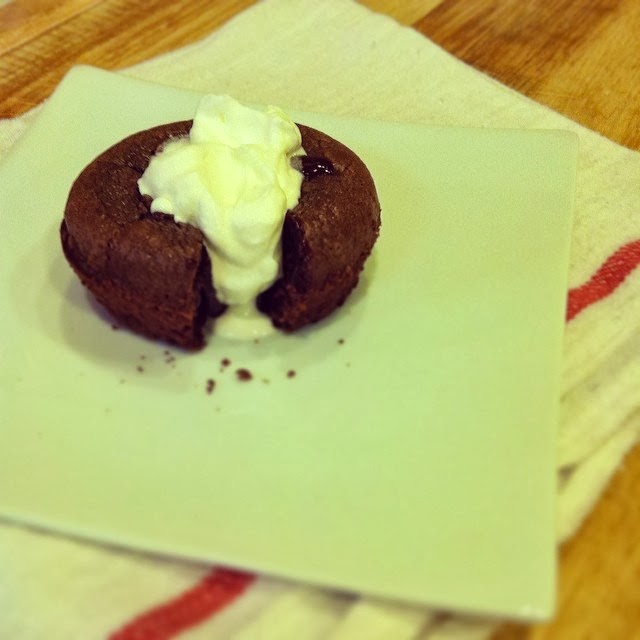

My attempt, yet again, to be artsy with my Iphone and Instagram. Hey, it does look pretty delicious, right?


Molten Lava Cakes for a Crowd
Serves 12

Rich and fudgy brownies were the go-to dessert at Whitney's house when a chocolate craving struck. That is, until she started making her molten lava cakes. These rich, gooey cakes will satisfy even the most die-hard chocoholics, and since they're baked in a muffin tin, it's easy to whip up a large batch in no time at all.

WHIPPED CREAM:
  • 1 cup heavy cream, cold
  • 2 1/2 tablespoons confectioners' sugar
CAKES:
  • 1 cup dark chocolate chips
  • 1 stick plus 2 tablespoons (5 ounces) unsalted butter
  • 2 tablespoons brewed coffee
  • 1/2 cup all-purpose flour
  • 1 1/2 cups confectioners' sugar
  • 3 large eggs, lightly beaten
  • 3 large egg yolks, lightly beaten
  • 1 teaspoon pure vanilla extract
  • 2 tablespoons unsweetened cocoa powder
Preheat the oven to 400°F. Lightly coat a 12-cup muffin tin with cooking spray.

To make the whipped cream: Beat the cream using an electric mixer in a large cold bowl until soft peaks form. Gradually beat in 2 tablespoons of the confectioner' sugar. Cover and refrigerate while you make the cakes.

To make the cakes: Melt the chocolate chips and butter in a medium saucepan over low heat, stirring frequently. Once the chocolate and butter are melted, stir in the coffee until smooth.

In a medium bowl, sift together the flour and confectioners' sugar. Stir in the chocolate mixture. Add the whole eggs and egg yolks one at a time, beating well after each addition. Stir in the vanilla.

Divide the batter evenly among the muffin cups. Bake until the cakes are slightly jiggly in the center, about 7 minutes. Run a butter knife around the edges of each cake and transfer the hot cakes to dessert plates. Top with a dollop of whipped cream and dust with the cocoa powder.

- See more at: http://www.boomerbrief.com/2011/11/modern-hospitality.html#sthash.LR1Iy3U4.dpuf
Molten Lava Cakes for a Crowd
Serves 12

Rich and fudgy brownies were the go-to dessert at Whitney's house when a chocolate craving struck. That is, until she started making her molten lava cakes. These rich, gooey cakes will satisfy even the most die-hard chocoholics, and since they're baked in a muffin tin, it's easy to whip up a large batch in no time at all.

WHIPPED CREAM:
  • 1 cup heavy cream, cold
  • 2 1/2 tablespoons confectioners' sugar
CAKES:
  • 1 cup dark chocolate chips
  • 1 stick plus 2 tablespoons (5 ounces) unsalted butter
  • 2 tablespoons brewed coffee
  • 1/2 cup all-purpose flour
  • 1 1/2 cups confectioners' sugar
  • 3 large eggs, lightly beaten
  • 3 large egg yolks, lightly beaten
  • 1 teaspoon pure vanilla extract
  • 2 tablespoons unsweetened cocoa powder
Preheat the oven to 400°F. Lightly coat a 12-cup muffin tin with cooking spray.

To make the whipped cream: Beat the cream using an electric mixer in a large cold bowl until soft peaks form. Gradually beat in 2 tablespoons of the confectioner' sugar. Cover and refrigerate while you make the cakes.

To make the cakes: Melt the chocolate chips and butter in a medium saucepan over low heat, stirring frequently. Once the chocolate and butter are melted, stir in the coffee until smooth.

In a medium bowl, sift together the flour and confectioners' sugar. Stir in the chocolate mixture. Add the whole eggs and egg yolks one at a time, beating well after each addition. Stir in the vanilla.

Divide the batter evenly among the muffin cups. Bake until the cakes are slightly jiggly in the center, about 7 minutes. Run a butter knife around the edges of each cake and transfer the hot cakes to dessert plates. Top with a dollop of whipped cream and dust with the cocoa powder.

- See more at: http://www.boomerbrief.com/2011/11/modern-hospitality.html#sthash.LR1Iy3U4.dpuf
Molten Lava Cakes for a Crowd
Serves 12

Rich and fudgy brownies were the go-to dessert at Whitney's house when a chocolate craving struck. That is, until she started making her molten lava cakes. These rich, gooey cakes will satisfy even the most die-hard chocoholics, and since they're baked in a muffin tin, it's easy to whip up a large batch in no time at all.

WHIPPED CREAM:
  • 1 cup heavy cream, cold
  • 2 1/2 tablespoons confectioners' sugar
CAKES:
  • 1 cup dark chocolate chips
  • 1 stick plus 2 tablespoons (5 ounces) unsalted butter
  • 2 tablespoons brewed coffee
  • 1/2 cup all-purpose flour
  • 1 1/2 cups confectioners' sugar
  • 3 large eggs, lightly beaten
  • 3 large egg yolks, lightly beaten
  • 1 teaspoon pure vanilla extract
  • 2 tablespoons unsweetened cocoa powder
Preheat the oven to 400°F. Lightly coat a 12-cup muffin tin with cooking spray.

To make the whipped cream: Beat the cream using an electric mixer in a large cold bowl until soft peaks form. Gradually beat in 2 tablespoons of the confectioner' sugar. Cover and refrigerate while you make the cakes.

To make the cakes: Melt the chocolate chips and butter in a medium saucepan over low heat, stirring frequently. Once the chocolate and butter are melted, stir in the coffee until smooth.

In a medium bowl, sift together the flour and confectioners' sugar. Stir in the chocolate mixture. Add the whole eggs and egg yolks one at a time, beating well after each addition. Stir in the vanilla.

Divide the batter evenly among the muffin cups. Bake until the cakes are slightly jiggly in the center, about 7 minutes. Run a butter knife around the edges of each cake and transfer the hot cakes to dessert plates. Top with a dollop of whipped cream and dust with the cocoa powder.

- See more at: http://www.boomerbrief.com/2011/11/modern-hospitality.html#sthash.LR1Iy3U4.dpuf

Wednesday, January 1, 2014

How-to Host: A Cheese Party

When I was little, I remember having themed birthday parties -- think Disney Princesses, Little House on the Prairie and countless middle school slumber parties. As I've grown older, I've missed the excitement of a themed birthday party. Thankfully our seminary friends are really good at having themed parties. Last year we celebrated our friend, Lauren, with a "favorite things" surprise birthday party. All of her favorite foods were there. Our other friend, Quentin, had a beard birthday party. So, when it was my turn, I thought about a theme for me. One of my favorite things in the world is cheese. I told Kyle that I would love to have a cheese party for my birthday, so we did just that. It was such a hit. Do yourself a favor, have a cheese party sometime with your friends (birthday or not). It's just too much fun! Here's the scoop and a little "how-to host."

Having a cheese party can be expensive to host if you're planning on providing all the cheese. So, we asked each couple/family to bring their favorite block of cheese along to share. With a little bit of communication, the result was beautiful. We ended up with Sharp Wisconsin White Cheddar, Extra Sharp New York White Cheddar, Sharp Cheddar, Brie, Gouda, and a Cheeseball. And my wonderful co-worker, Sarah, made me a beautiful strawberry cake to share with our guests!

As hosts, we provided crackers, baguettes, jam, marinated olives and sparkling cranberry lemonade. The following are my best recommendations and recipes!

- Trader Joe's Cracker Assortment (the peppered crackers are my absolute favorite!)
- Kroger Country Club Wheat Crackers
- Wheat Thins Tuscan and Herb 
- Panera Bread Baguettes. The Seminary receives free bread every Monday, so I picked up four baguettes for the party and we really could have used more (to serve 16).
- Bonne Maman Strawberry Preserves. Listen to me people, this stuff is straight from France. There's no messing around with Jam anymore. Bonne Maman is the real deal and you can even find it at Kroger!

 Marinated Olives Recipe

What you'll need: 
- 1 13 oz. jar of Kalamata Olives (pitted) or any olives that you'd prefer
- 1/4 cup Extra Virgin Olive Oil
- 2 garlic cloves, peeled, smashed and minced
- 2 sprigs of fresh thyme (leaves removed from stem and chopped; discard stems)
- 1 sprig of fresh rosemary (leaves removed from stem and chopped; discard stem)
- 1/2 teaspoon of grated lemon peel
- 1 tablespoon of freshly grated Parmesan

Directions: 
1. Drain olives, then chop all olives and move to a separate bowl.
2. In a medium skillet, over medium-low heat, warm olive oil, garlic, herbs and lemon peel until fragrant (2-3 minutes).
3. Add olives into the skillet; toss until they're well coated and warmed through
4. Remove olives from skillet to a bowl and refrigerate for 1-2 hours, or until ready to serve.
5. Prior to serving, add Parmesan to the olive mixture and toss well.
6. Serve marinated olives with small toasts

Cranberry Lemonade

I don't have particular measurements for this. I just used a half/half mixture of lemonade and Cranberry Sierra Mist. I added cranberries and sliced lemons to garnish. Waaa la!

And that, ladies and gentlemen, is that. The party was SO much fun. It was definitely one of my favorite birthdays. Wonderful company, golden baguettes, jam, cheese, friends, homemade birthday cards and flowers -- it was all so perfect. I'm so grateful for such a wonderful season at seminary and some really classy friends!


The spread.

Panera Baguettes. Delicious!

Extra Sharp New York White Cheddar Cheese! Sharp cheese is my love language.

Marinated olives and toasts.

Bonne Maman Jam in action.

Birthday flowers from beautiful friends.

The Sparkling Cranberry Lemonade was a real hit.

Sarah's delectable strawberry cake with cream cheese frosting.

My lady friends (and Sheppy, too!).


Monday, December 9, 2013

Baking Sunday: Pizza Dough {With Herbs} using the KitchenAid

'Tis the season for...Advent, food, parties and many other things. I love this time of year. I love advent;  I love celebrating; I love food; I love parties; I love people and family. The list could go on and on. I have been doing so much extra cooking lately, I hardly know where to begin or what to share with you! On Saturday night, I made some excellent stuffed mushrooms. I was really excited because I made the recipe up by going off of some awesome stuffed mushrooms I once had. It's great how your taste buds can lead you in the right direction sometimes, isn't it? Sunday, we followed suite with the rest of our village and stayed in due to icy roads, so I spent the morning listening to Church of the Resurrection Online and making Strawberry Napoleans for a "Sip and See." Then, last night, for Baking Sunday, Jenny and I made homemade pizza! Asbury was supposed to host an Advent Vespers Service, but cancelled it due to the ice. Last year, after the Advent Service, we ate with friends and it's one of my very favorite memories. This year, I decided the same tradition must be appropriate. So, Baking Sunday and the After-Advent-Service-Meal-Gathering collided. It was too good.

With that said, enjoy the pizza dough recipe below. This recipe is so versatile. I've made it so many times. Sometimes I make it plain; sometimes with garlic and herbs. My grandma has made it with wheat flour, by hand; I allow my Kitchenaid to do all the work. The thing I like most about it, though, is that you know exactly what's going into your dough. And, there's just something about bread that's intriguing to me. The world lives on bread, it's a simple food that we all have in common. I like to make my own because it makes me feel like I'm holding something in common with people around the globe. Is that weird? Maybe. I'm getting spiritual on you. Ok, really, enjoy the dough!

Recipe adapted from A Couple Cooks. 

Homemade Pizza Dough (Makes two medium pizzas)

What you'll need:
  •  3 cups of flour
  • 1 packet (or two teaspoons) of highly active, fast rising yeast
  • 1/2 Tablespoon of oil
  • 1/4 teaspoon of salt
  • 1 1/3 cups of warm water
To Add Garlic and Herbs to the dough (if you prefer, if not, skip this step):
  • 1-2 cloves of garlic (depending upon preference and size of the clove)
  • 1 teaspoon of dried basil
  • 1 teaspoon of dried oregano
Directions:

1. In your KitchenAid bowl, combine flour, yeast, oil, salt, and about a cup of the warm water.

2. Using the dough hook on your Kitchenaid mixer, stir until a loose dough begins to form. Add in the remaining water as the dough begins to form. If the dough appears too dry after you add in the water, add a little bit more; if it appears too wet, sprinkle in a little bit of flour. The dough should start pulling away from the side of the bowl and begin forming into a ball after 30 seconds or so.

3. When the dough forms into a ball, gradually increase the speed of your KitchenAid to medium. The dough ball should remain intact on the dough hook. If it's not hooking, turn your mixer off and help it hook and gradually increase the speed again. This happens to me, every so often. Otherwise let the mixer knead the dough on medium speed for 8 minutes.

4. While the dough is kneading, prepare a floured surface for the dough to rise on. Then, prepare a damp towel to cover the dough. I normally use a spray bottle to dampen my kitchen towel.

5. When the dough is finished kneading, use floured-hands to remove the dough from the bowl. Divide the dough in half and form into two boules. Set them on the floured surface to rise. Rub a tiny bit of olive oil on top of each of the doughs so they don't dry out. Then, cover both boules with the damp cloth. Let the dough rise for 45 minutes - 1 hour. About 15 minutes into the rise time, preheat the oven to 500 F.

6. When the dough is finished rising, gently shape the dough into circles on pizza pans/stones. Do not overwork the dough.

7. Prepare the dough with your favorite toppings and cook for 6-8 minutes.

- I normally use an Airbake pizza pan (it has holes) and it cooks well on the top rack, and my normal pizza pan cooks better on the bottom rack, closer to the burner.


Monday, November 18, 2013

Baking Sunday: Pumpkin Spiced Scones

Yesterday was a rainy, cold Sunday in Wilmore. Baking was the perfect remedy -- the best indoor activity. As my friend, Anna Chua, says: "Baking is always more enjoyable on Sundays." I think I agree. With Thanksgiving ahead, the season of pumpkin everything is slowly drawing to a close. So, Jenny and I decided to make pumpkin spiced scones and take advantage of the season.

Let me start by saying that these scones are incredibly fantastic. Really. I'm not a pumpkin pie person (unless it has a lot of whipped cream), but I enjoy other, subtle, pumpkin-y things. These hit the spot. And I love how versatile they are. You can eat them for breakfast, a snack or dessert; or have them with some tea or milk. They're just that good. I'm thinking of making them again the week of Thanksgiving since we have friends visiting. And I might even make them after that for a baby shower. So, enjoy this recipe just in time for Thanksgiving gatherings.

This recipe is courtesy of Joanne and Adam Gallagher from inspiredtaste.net. We changed a few things within the recipe, which I've noted below. Enjoy!

What you'll need for the scones:

2 cups of all-purpose flour
1/3 cup of brown sugar
1 teaspoon of baking powder
1/2 teaspoon of baking soda
1/2 teaspoon of salt
1 teaspoon of ground cinnamon
3/4 teaspoon of ground ginger
3/4 teaspoon of ground cloves
1/2 teaspoon of ground nutmeg
1/2 cup of cold, unsalted butter, cut into pieces (1 stick)
1/2 cup pure pumpkin
1 tablespoon of unsulphured molasses (you can go without, if need be or try substituting with a little more brown sugar or honey) 
1 egg
3 tablespoons of half and half
2 teaspoons of vanilla

For sugar glaze: 
1 cup of powdered sugar
1-2 tablespoons of half and half (we used around 2 tablespoons)

For pumpkin spice glaze: (I cut this recipe in half from the original, you just don't need it all, double it if you think you'll want more.)
1/2 cup of powdered sugar 
1/2 tablespoon of pure pumpkin
Dash of cloves
Dash of nutmeg
Dash of ginger
1/8 teaspoon of cinnamon
1 tablespoon of half and half
*Technically, you only need about 1/16 of a teaspoon of cloves, nutmeg and ginger. I just sprinkled some of each across the top.

To Bake: 
Heat the oven to 400 degrees and spray a large baking sheet with non-stick cooking spray.

In a large bowl, whisk flour, brown sugar, baking powder, baking soda, salt and all the spices together. Then, add the cold, cut butter to the mixture. Use a pastry blender or two knives to cut the butter into the mixture until it resembles coarse cornmeal or crumbs.

In a separate medium bowl whisk together the pumpkin, molasses, half and half, vanilla and egg. Whisk until blended well.

After that, stir the pumpkin mixture into the flour/butter mixture and stir with a spoon until a soft dough forms.

After that, transfer the dough to a floured surface and knead it until it comes together. Pat the dough out into a 10x7 inch rectangle. Then, you can either make 8 regular sized scones or 12 smaller scones. We made 8 regular sized scones. To do that, cut the dough in half both lengthwise and width-wise to make four smaller rectangles. Then, cut the rectangles into triangles (making 8 scones).

To make 12 smaller scones, cut the dough in half lengthwise. Then, cut the the dough twice width-wise, so you have six small rectangles. Then, cut those rectangles into two triangles. Voila.

Make sure your baking sheet is sprayed, transfer the scones over and bake for 10-15 minutes. Ours were done in 10 minutes. You can insert a toothpick in the middle of one of the scones to make sure they are finished. Transfer the scones to a wire rack to cool.

While the scones cool, make one or both glazes (We made both!).

For the Sugar Glaze:

Add powdered sugar to medium bowl and add one tablespoon of half and half. Judge the consistency. If it's too thick, add more half and half (we used around 2 tablespoons). The glaze should be set when it slowly drizzles off the spoon.

When the glaze is finished, ice the top of each scone (using a spoon, or the like). Then, let the glaze set while you make the pumpkin glaze.

For the Pumpkin Spice Glaze:

Combine powdered sugar, pumpkin and spices. Then, add in the half and half. Stir and judge the consistency. The glaze should be set when it slowly drizzles off the spoon.

When the glaze is finished, use a spoon to drizzle the pumpkin glaze over the scone in a zig-zag pattern.

Last of all, let the scones cool and set for a few minutes and enjoy! They are delicious warm.


Monday, November 11, 2013

Baking Sunday: White Chocolate Bread Pudding

This past Sunday, Jenny and I made White Chocolate Bread Pudding for Baking Sunday. It was delicious. After we made it, though, Jenny noted that it's one of those desserts that you order at a restaurant and never worry about asking what's in it. Because, my fellow bakers and readers, there's a lot of heavy cream. I mean, like, a lot. That's what makes it so delicious and pretty rich. So, if you're going to splurge on dessert during the holidays, I would recommend this White Chocolate Bread Pudding. Enjoy!

An overview of what you'll need:
  • 18 ounces of quality white chocolate chips (about a bag and a half)
  • 3 cups of milk
  • 1 quart of heavy cream (1/2 quart to be used for the pudding and 1/2 a quart to be used for the white chocolate sauce)
  • 1 cup of sugar
  • 5 eggs, well beaten
  • 2 loaves of french bread, cubed
Directions:
  1. Begin by preheating the oven to 300 degrees.
  2. Cube both bread loaves. When finished, place cubes in a greased 9x13 baking dish.
  3. Next, place 12 oz. of white chocolate chips in large bowl and set it aside.
  4. Then, in a large saucepan, over medium heat, mix the milk, 1/2 quart of cream and sugar. Bring it to a gentle boil and then pour the mixture over the white chocolate chips in the large bowl. Let the mixture sit for about a minute and then whisk until smooth. 
  5. Add the eggs to the mixture and mix well. 
  6. When finished, pour the white chocolate mixture over the cubed bread. 
  7. Cover the baking dish with aluminum foil and bake for 1 - 1 1/2 hours, until the center is set. 
For the White Chocolate Sauce
  1. While the bread pudding cools, place 6 oz. of white chocolate chips in a separate medium bowl. 
  2.  In a sauce pan, bring the remaining 1/2 quart of cream to a gentle boil. Then, pour the cream over the white chips. Let set for about a minute and then whisk until smooth. 
  3. Drizzle the white chocolate sauce over each individual serving of pudding when you're ready to serve.


Thursday, September 26, 2013

Baked Beef Tostadas with Mexican Rice


I think I'm going to start adding a few of my recipes to my blog. It's fun for me and it might give you some ideas if you're ever in a dinner pinch. Plus, for my happiness project, I decided that I want to focus on promoting hospitality via cooking/hosting for others. So, here are all of those ideas wrapped in one. Today, I'm featuring traditional ground beef tostadas with mexican rice.

I'm from Kansas. I grew up eating beef. My family often raised cattle on our farm and had them butchered locally. However, when I moved to Kentucky, I soon figured out that beef tastes a whole lot less appetizing around here. I actually prefer chicken anyway (unless we're talking about brisket or flat iron steak and then you're speaking my love language). However, I don't mind using ground beef for some things and when it's terribly bland, it's a fun challenge to spice it up. Enjoy the recipe below.

Serves: Approx. 4 (rice will definitely feed at least four)

Ingredients for Tostadas:
- 1/2 pound lean ground beef
- taco seasoning (check out my taco seasoning from this blog here)
- 4 corn tortillas
- EVOO (for coating tortillas)
- 15 oz of pinto beans (drained if you're using them from a can)
- Feta Cheese
- Cilantro (for garnish)

Ingredients for Mexican Rice:
- 1 cup of jasmine rice
- 1 1/2 Tbsp EVOO
- 2 cups broth (chicken, beef or veggie will work just fine)
- 1 can (8 oz.) tomato sauce
- 1 clove of garlic (minced)
- 1/2 tsp cumin
- Leaves from 3-4 sprigs of cilantro
- Dash of ground red pepper (if you want some extra spice)

For the Tostadas:
Preheat oven to 410 F

Cook ground beef; rinse; drain. Return to the skillet. Add in pinto beans and taco seasoning along with a 1/4 cup of water or so. This will help create a nice sauce for the ground beef and bean mixture. Let mixture come to a boil, then simmer it on low for five minutes or so, stirring periodically.

Meanwhile, lay corn tortillas out on a baking sheet. Coat both sides lightly with EVOO. Make sure the surface area of the tortillas are covered or the shells will turn out chewy instead of crunchy. Bake the shells for 5 min. on each side. When finished, top each shell with the ground beef/bean mixture. Then, top with feta. Bake in the oven for 3-5 additional minutes. Garnish with cilantro or any other toppings.

*I like using feta cheese in this dish because it's saltier than cheddar or mozzarella. It really brings out the flavor in the ground beef. 

For the Mexican rice:

In a skillet, on medium heat, stir jasmine rice and EVOO until the rice is puffy and golden, about 5 minutes. After that, add in the broth slowly and carefully (the rice and oil will begin to pop when you do this). Also add in tomato sauce, garlic, cumin, red pepper (optional). Stir rice so the ingredients blend together well. Wait for the rice to return to a boil, then cover the skillet and reduce to low heat. Let the rice simmer for 10 minutes or so. Stir in cilantro and let rice cook for 3-5 additional minutes or until the rice begins sticking to the bottom of the pan. Add extra salt if need be (I normally don't add much).

Delicioso!

 Molly

Friday, March 8, 2013

Fun in February

I'm a little late posting about my happiness project for February. I got so worked up about FedLoans last week :). Anyway, for the month of February I went on a "pasta adventure" with Kyle and hosted people in my home. 

The pasta adventure was a lot of fun. Kyle and I love pasta, we seem to have the same things over and over when it comes to pasta, so I was intentional about changing things up. It was a fun experiment and I learned a lot about pasta. Most of the time, we just eat whole wheat thin spaghetti. However, in February, I searched the pasta aisles for some different options and discovered that there is 51% whole wheat pasta, and 3x fiber white pasta. What? 51% whole wheat? Whatever. Here are some of the fun pasta dishes we had during the month of February and a little on into the month of March. 
  • Mexican Stuffed Shells (Jumbo Shells!) 
  • Spinach Lasagna Roll ups 
  • Pesto, Cream Cheese and Chicken Farfalle
  • Zucchini Spaghetti with Chicken
  • Chicken and Noodles (Using Orzo, one of my favorite pastas!)
Mmm, so yummy. 

As for hosting guests. At the beginning of February, we hosted a "Ground Hog Supper" in our home and invited some of our friends over. The Menu: Sausage, mashed potatoes with sausage gravy, corn, biscuits, applesauce, vanilla ice cream and apple and cherry pie. It was a good night full of food, games and even some serious midnight talks about the power of campus ministry. 

For the month of March, my goal is to find something I'm passionate about (outside of seminary) and become an advocate for it. Until then, see you next month, with a little bit of blogging in-between! 


Tuesday, October 23, 2012

Taco Seasoning!


One of my favorite things to do is cook! Especially when I have the time for it :). One of our favorite meals (like anyone) is tacos! It's such an easy fall-back meal. However, if you've ever been in the store and picked up pre-packaged taco seasoning you will notice how much sodium it has. It has a gunk-load. In light of that, Kyle and I have been using a simple mix of spices to create our own taco seasoning. Not only is it delish, but it also has so much less sodium. It makes taco night more enjoyable and healthy. I thought I would share it here: 

1 Tbsp chili powder
1 Tbsp cumin
1 Tbsp garlic powder
1 Tbsp onion powder 
1/4 - 1/2 crushed red pepper (if you want some extra spice) 

Enjoy!

P.S. I received this from my mother-in-law, Mary Lou, back when we moved to Kentucky.