Jenny and I decided to make French Macarons this past Baking Sunday. Macarons are notorious for being tricky and complex. We had a real adventure! Jenny studied abroad in France while she was in college so she found legitimate recipes (one for the meringue shell and one for the ganache) online because you can't make macarons the American way! No butter allowed. Our first batch of meringues turned out okay, but they were sticky and we couldn't figure out if they had baked long enough. The second time around proved a whole lot more successful. We lightly greased the pan, which was actually really helpful and I turned the oven down to 300F instead of 275F as the recipe called.
In addition to being tricky in general, macarons require you to pay attention to detail. We used the food processor to make our own almond meal and Jenny strained it through a mesh sieve twice. It's important for the almond meal to be very fine. I also learned that when you're making the sugar syrup, you cannot stir it or touch it with a spoon once it has boiled. Stirring it allows oxygen in, and in turn makes the mixture solidify. I was in charge of the sugar syrup and did that! Oh jeez. I learned a baking lesson the hard way and had to re-make the sugar syrup. I told Jenny when we were baking that macarons wouldn't be fun to make alone! I think our total baking time (we made two batches) ended up being 3 1/2 hours or so. But the little jewels were well worth the effort and it was a lot of fun. Our second batch wasn't too shabby! Plus, the raspberry/white chocolate ganache is to die for. And now we can say that we've made macarons. Ladies and gents, our baking has ascended to a new skill level and that's a good thing, too, because the semester is almost over and Jenny is going home! What am I going to do without her? I told her we will have to have Skype Baking Sundays. Otherwise, I'm trying not to think about her going back to Mississippi :(.
I know it seems silly, but Baking Sunday has been one of best ways that I've experienced God! It's been so fun to anticipate fellowship each week and create. Baking Sunday often reaches farther than Sunday, too. It enabled me to make a GREAT friend (Jenny), have some really fun and meaningful conversations along the way, and to share our baking goodies with others in the Asbury community. My bosses at work benefit the most ;). Baking Sunday has truly been nurturing for my soul. What a wonderful sabbath activity it has been.
Besides what I listed above, I have no extra critiques about the macarons. I am just going to leave you with links to the original recipes that we used. They worked out pretty well for us. Enjoy!
- Recipe for the meringues here
- Recipe for the raspberry ganache here
Bon appétit my fellow Sunday bakers!
Showing posts with label Baking Sunday. Show all posts
Tuesday, May 6, 2014
Monday, April 28, 2014
Baking Sunday: Lavender Cupcakes with Cream Cheese & Honey Frosting
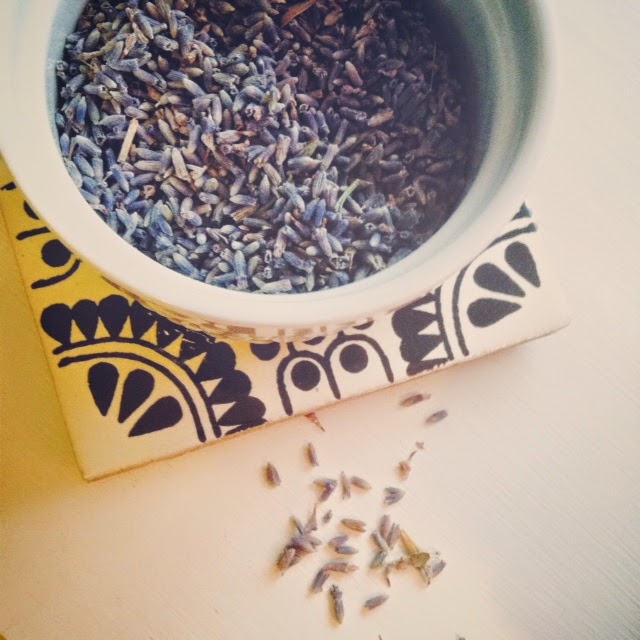
I am so, so, so excited to share this Baking Sunday recipe with you! And I'm SUPER stoked about my pictures this week. I was getting fancy with my Iphone and VscoCam. Things have been so crazy in seminary lately that I haven't had much of a chance to blog about all of the delicious things that Jenny and I have been making -- scratch that, baking. From cinnamon rolls to key lime pie, banana bread bars, black bean double chocolate chip cookies, it's all been good, people. But these lavender cupcakes are the pinnacle of our baking, in my opinion. They're so creative, unique and dreamy. I've literally never tasted anything like them. The combination of lavender, honey and vanilla is too good.
When I told one of my friends at church that we were baking lavender cupcakes she made me nervous. She told me that her mother-in-law had made lavender cheesecake once and it tasted like a candle. Then, I was reading some of the reviews for this recipe and some people said that the dried lavender they used was tasteless. Let me tell you, we didn't run into either problem. The cupcakes don't taste like candles and they aren't tasteless. They're delicious! So, I feel like we hit the jack-pot. Please make these, okay?
Recipe courtesy of Jessie Next Door
*I've cut the frosting recipe in half because we had SO much left over. Unless you want to OD on cream cheese and honey frosting (which, hey, you might and I won't judge you) I think my adjustment covers the amount you'll need.
What you'll need for the cupcakes:
When I told one of my friends at church that we were baking lavender cupcakes she made me nervous. She told me that her mother-in-law had made lavender cheesecake once and it tasted like a candle. Then, I was reading some of the reviews for this recipe and some people said that the dried lavender they used was tasteless. Let me tell you, we didn't run into either problem. The cupcakes don't taste like candles and they aren't tasteless. They're delicious! So, I feel like we hit the jack-pot. Please make these, okay?
Recipe courtesy of Jessie Next Door
*I've cut the frosting recipe in half because we had SO much left over. Unless you want to OD on cream cheese and honey frosting (which, hey, you might and I won't judge you) I think my adjustment covers the amount you'll need.
What you'll need for the cupcakes:
- 1/2 cup (1 stick) butter, softened
- 1 cup sugar
- 2 eggs
- 2 teaspoons of vanilla
- Purple, or red and blue frosting, tint the batter to your liking. We made ours a light lavender color.
- 1 1/2 cups of all-purpose flour
- 1/2 teaspoon of baking powder
- 1/4 teaspoon of salt
- 2 1/2 tablespoons of dried lavender buds (I found mine at World Market...Whole Foods didn't have any, neither did Mejier and I didn't check at Trader Joe's)
- 2/3 cup cold milk
- 1/4 cup butter (1/2 stick)
- 4 ounces cream cheese, softened
- 2 cups of confectioners' sugar
- 1 tablespoon of vanilla
- 1 tablespoon of honey, and more for drizzling
- Preheat oven to 350 F. Line muffin tins with cupcake liners or grease the tins with butter.
- Chop the dried lavender buds into fine pieces and set aside.
- Using an electric mixer or a stand mixer, cream the butter and sugar together. Add the eggs one at a time, beating after each egg. Mix in the vanilla and the food coloring.
- In another bowl, stir together the flour, baking powder, salt and chopped lavender buds.
- Add the dry ingredients to the butter mixture and beat together, then stir in the milk.
- Scoop the batter evenly into the muffin tins.
- Bake for 18-24 minutes or until a toothpick inserted into the center of a cupcake comes out clean.
- Let the cupcakes cool in the tins for 5-10 minutes and then move them to a wire rack to cool completely.
- In a large bowl (or in the stand mixer), beat butter and cream cheese together. Add the powdered sugar, one cup at a time, mixing on low, until the frosting is smooth and creamy. Beat in the vanilla and honey.
- Scoop the frosting into a piping bag or ziplock bag and pipe the frosting onto the cupcakes in the way that you see fit.
- After you're finished frosting the cupcakes, drizzle some honey on top (this is a great opportunity to use your honey spoon if you have one ;))!
- Garnish with some dried lavender, if you want, and enjoy
Monday, February 24, 2014
Baking Sunday: Molten Lava Chocolate Cakes For a Crowd
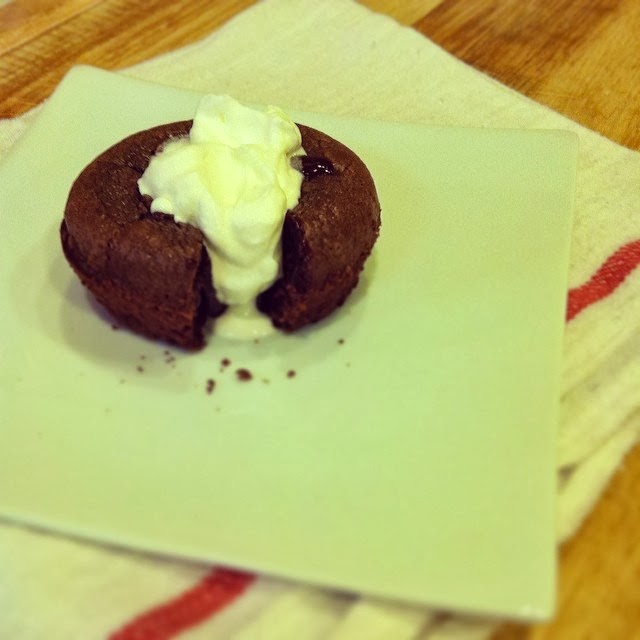
Today I made myself work out before blogging. I suggest working out before reading this post because this Baking Sunday is a good one, especially if you're a chocolate lover. Ladies and Gentlemen, I present to you Molten Lava Cakes courtesy of Master Chef, Whitney Miller!
Jenny and I enjoyed making these. The trick to these are baking them for a short period of time so the outside gets done and the inside middle stays liquid-y chocolate. They are delicious with a dollop of homemade whipped cream and these are so easy to make! Miller suggest baking them in a muffin pan. So if you are ever in need an easy dessert that's impressive, for 12 people or under, these are definitely go-to and are sure to please.
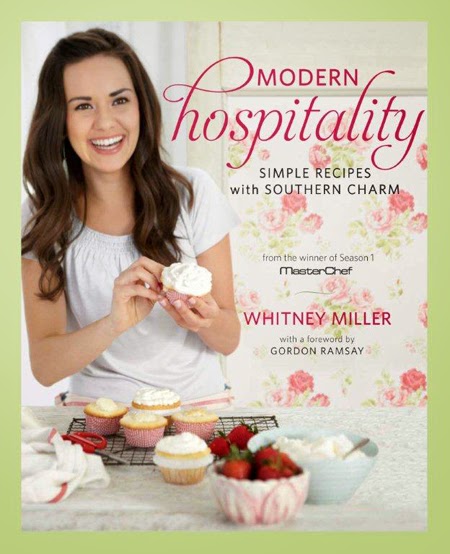
Last of all, my journey with Whitney Miller's cook book has been a fun one. I found her book while perusing through the cooking section at Half Price Books in Dallas this past summer (one of my favorite pastimes). I was originally attracted to the title of her cook book, "Modern Hospitality." Then, when I started looking through it, I became so intrigued! I thought to myself, "These are recipes that I would actually cook." So, I bought the book and have loved it dearly ever since. (Then, I watched her season of Master Chef. Thanks, YouTube). Miller's cook book features various updated versions of southern classics, she is a Mississippi girl after all, and I love that she learned to cook from her mother, grandmothers and great-grandmothers. We also discovered that her and Jenny attended the same college. Jenny is a Mississippi girl, too. I just love these southern belles.
Now for the REALLY exciting part: Saturday night, I tweeted about being excited to make the molten lava cakes with Jenny and tagged Miller in my tweet. Sunday, while Jenny and I were baking, she tweeted me back! I was SO excited. It's just kind of fun to have a Master Chef tweet you, you know? I sent her a picture of our final product and she said, "They look great!" :). So, these have the Master Chef's approval. Anyway, enough excitement. Enjoy the recipe, won't you? And grab a copy of Miller's cookbook if you have the chance. You won't be disappointed!
- See more at: http://www.boomerbrief.com/2011/11/modern-hospitality.html#sthash.LR1Iy3U4.dpuf
Jenny and I enjoyed making these. The trick to these are baking them for a short period of time so the outside gets done and the inside middle stays liquid-y chocolate. They are delicious with a dollop of homemade whipped cream and these are so easy to make! Miller suggest baking them in a muffin pan. So if you are ever in need an easy dessert that's impressive, for 12 people or under, these are definitely go-to and are sure to please.
Last of all, my journey with Whitney Miller's cook book has been a fun one. I found her book while perusing through the cooking section at Half Price Books in Dallas this past summer (one of my favorite pastimes). I was originally attracted to the title of her cook book, "Modern Hospitality." Then, when I started looking through it, I became so intrigued! I thought to myself, "These are recipes that I would actually cook." So, I bought the book and have loved it dearly ever since. (Then, I watched her season of Master Chef. Thanks, YouTube). Miller's cook book features various updated versions of southern classics, she is a Mississippi girl after all, and I love that she learned to cook from her mother, grandmothers and great-grandmothers. We also discovered that her and Jenny attended the same college. Jenny is a Mississippi girl, too. I just love these southern belles.
Now for the REALLY exciting part: Saturday night, I tweeted about being excited to make the molten lava cakes with Jenny and tagged Miller in my tweet. Sunday, while Jenny and I were baking, she tweeted me back! I was SO excited. It's just kind of fun to have a Master Chef tweet you, you know? I sent her a picture of our final product and she said, "They look great!" :). So, these have the Master Chef's approval. Anyway, enough excitement. Enjoy the recipe, won't you? And grab a copy of Miller's cookbook if you have the chance. You won't be disappointed!
Molten Lava Cakes for a Crowd (Master Chef, Whitney Miller)
*This recipe is taken straight from her cook book! No alterations.
Serves 12
WHIPPED
CREAM:
- 1 cup heavy cream, cold
- 2 1/2 tablespoons confectioners' sugar
CAKES:
- 1 cup dark chocolate chips
- 1 stick plus 2 tablespoons (5 ounces) unsalted butter (salted will work if that's all you have)
- 2 tablespoons brewed coffee
- 1/2 cup all-purpose flour
- 1 1/2 cups confectioners' sugar
- 3 large eggs, lightly beaten
- 3 large egg yolks, lightly beaten
- 1 teaspoon pure vanilla extract
- 2 tablespoons unsweetened cocoa powder
Preheat
the oven to 400°F. Lightly coat a 12-cup muffin tin with cooking spray.
To make
the whipped cream: Beat the
cream using an electric mixer in a large cold bowl until soft peaks form.
Gradually beat in 2 tablespoons of the confectioner' sugar. Cover and
refrigerate while you make the cakes.
To make
the cakes: Melt the
chocolate chips and butter in a medium saucepan over low heat, stirring
frequently. Once the chocolate and butter are melted, stir in the coffee until
smooth.
In a
medium bowl, sift together the flour and confectioners' sugar. Stir in the
chocolate mixture. Add the whole eggs and egg yolks one at a time, beating well
after each addition. Stir in the vanilla.
Divide
the batter evenly among the muffin cups. Bake until the cakes are slightly
jiggly in the center, about 7 minutes. Run a butter knife around the edges of
each cake and transfer the hot cakes to dessert plates. Top with a dollop of whipped
cream and dust with the cocoa powder.
![]() |
| My attempt, yet again, to be artsy with my Iphone and Instagram. Hey, it does look pretty delicious, right? |
Molten Lava Cakes for a Crowd
Serves 12
Rich
and fudgy brownies were the go-to dessert at Whitney's house when a
chocolate craving struck. That is, until she started making her molten
lava cakes. These rich, gooey cakes will satisfy even the most die-hard
chocoholics, and since they're baked in a muffin tin, it's easy to whip
up a large batch in no time at all.
WHIPPED CREAM:
-
1 cup heavy cream, cold
-
2 1/2 tablespoons confectioners' sugar
CAKES:
-
1 cup dark chocolate chips
-
1 stick plus 2 tablespoons (5 ounces) unsalted butter
-
2 tablespoons brewed coffee
-
1/2 cup all-purpose flour
-
1 1/2 cups confectioners' sugar
-
3 large eggs, lightly beaten
-
3 large egg yolks, lightly beaten
-
1 teaspoon pure vanilla extract
-
2 tablespoons unsweetened cocoa powder
Preheat the oven to 400°F. Lightly coat a 12-cup muffin tin with cooking spray.
To make the whipped cream:
Beat the cream using an electric mixer in a large cold bowl until soft
peaks form. Gradually beat in 2 tablespoons of the confectioner' sugar.
Cover and refrigerate while you make the cakes.
To make the cakes:
Melt the chocolate chips and butter in a medium saucepan over low heat,
stirring frequently. Once the chocolate and butter are melted, stir in
the coffee until smooth.
In
a medium bowl, sift together the flour and confectioners' sugar. Stir
in the chocolate mixture. Add the whole eggs and egg yolks one at a
time, beating well after each addition. Stir in the vanilla.
Divide
the batter evenly among the muffin cups. Bake until the cakes are
slightly jiggly in the center, about 7 minutes. Run a butter knife
around the edges of each cake and transfer the hot cakes to dessert
plates. Top with a dollop of whipped cream and dust with the cocoa
powder.
Molten Lava Cakes for a Crowd
Serves 12
Rich
and fudgy brownies were the go-to dessert at Whitney's house when a
chocolate craving struck. That is, until she started making her molten
lava cakes. These rich, gooey cakes will satisfy even the most die-hard
chocoholics, and since they're baked in a muffin tin, it's easy to whip
up a large batch in no time at all.
WHIPPED CREAM:
-
1 cup heavy cream, cold
-
2 1/2 tablespoons confectioners' sugar
CAKES:
-
1 cup dark chocolate chips
-
1 stick plus 2 tablespoons (5 ounces) unsalted butter
-
2 tablespoons brewed coffee
-
1/2 cup all-purpose flour
-
1 1/2 cups confectioners' sugar
-
3 large eggs, lightly beaten
-
3 large egg yolks, lightly beaten
-
1 teaspoon pure vanilla extract
-
2 tablespoons unsweetened cocoa powder
Preheat the oven to 400°F. Lightly coat a 12-cup muffin tin with cooking spray.
To make the whipped cream:
Beat the cream using an electric mixer in a large cold bowl until soft
peaks form. Gradually beat in 2 tablespoons of the confectioner' sugar.
Cover and refrigerate while you make the cakes.
To make the cakes:
Melt the chocolate chips and butter in a medium saucepan over low heat,
stirring frequently. Once the chocolate and butter are melted, stir in
the coffee until smooth.
In
a medium bowl, sift together the flour and confectioners' sugar. Stir
in the chocolate mixture. Add the whole eggs and egg yolks one at a
time, beating well after each addition. Stir in the vanilla.
Divide
the batter evenly among the muffin cups. Bake until the cakes are
slightly jiggly in the center, about 7 minutes. Run a butter knife
around the edges of each cake and transfer the hot cakes to dessert
plates. Top with a dollop of whipped cream and dust with the cocoa
powder.
Molten Lava Cakes for a Crowd
Serves 12
Rich
and fudgy brownies were the go-to dessert at Whitney's house when a
chocolate craving struck. That is, until she started making her molten
lava cakes. These rich, gooey cakes will satisfy even the most die-hard
chocoholics, and since they're baked in a muffin tin, it's easy to whip
up a large batch in no time at all.
WHIPPED CREAM:
-
1 cup heavy cream, cold
-
2 1/2 tablespoons confectioners' sugar
CAKES:
-
1 cup dark chocolate chips
-
1 stick plus 2 tablespoons (5 ounces) unsalted butter
-
2 tablespoons brewed coffee
-
1/2 cup all-purpose flour
-
1 1/2 cups confectioners' sugar
-
3 large eggs, lightly beaten
-
3 large egg yolks, lightly beaten
-
1 teaspoon pure vanilla extract
-
2 tablespoons unsweetened cocoa powder
Preheat the oven to 400°F. Lightly coat a 12-cup muffin tin with cooking spray.
To make the whipped cream:
Beat the cream using an electric mixer in a large cold bowl until soft
peaks form. Gradually beat in 2 tablespoons of the confectioner' sugar.
Cover and refrigerate while you make the cakes.
To make the cakes:
Melt the chocolate chips and butter in a medium saucepan over low heat,
stirring frequently. Once the chocolate and butter are melted, stir in
the coffee until smooth.
In
a medium bowl, sift together the flour and confectioners' sugar. Stir
in the chocolate mixture. Add the whole eggs and egg yolks one at a
time, beating well after each addition. Stir in the vanilla.
Divide
the batter evenly among the muffin cups. Bake until the cakes are
slightly jiggly in the center, about 7 minutes. Run a butter knife
around the edges of each cake and transfer the hot cakes to dessert
plates. Top with a dollop of whipped cream and dust with the cocoa
powder.
Monday, January 13, 2014
Baking Sunday: Pesto, sundried tomato and garlic braided bread
After all the holidays and traveling, I was ready to do a little Baking Sunday again. The only thing missing from this Baking Sunday was Jenny! I'm looking forward to her return. Otherwise, last night was a fun adventure in the bread making and baking world. Spaghetti Carbonara was on zee menu, so I thought bread might be complementary, as it always is. And, I'm a fan of the occasional carb overload. It all worked out for me. Also, big shout-out to my dear, Kirsten Frost, who I met this summer at Project Transformation. She is taking an artisan bread baking class for her interm! She is learning to bake different kinds of bread...all for credit. Now, people, to me, that's money well spent. What I would give to have a fun class like that! A part of her class also includes blogging her baking experiences. I highly recommend that you check it out if baking is your thing. It's so fun! See it here: http://collegiatecarbohydrates.wordpress.com/
Now, onto the bread. I found this bread recipe when I was researching Nudo olive oil back in December. I fell in love with it and couldn't wait to bake it. It's a pretty normal dough recipe (very similar to my pizza dough, so the directions will be the same at first), but it splits the bread into three sections after its rise time and calls for you to work basil pesto into one section, sundried tomatoes into another and fresh, pressed garlic into another. Then you braid the pieces together to bake them. This bread is pretty heavenly, especially hot, out of the oven with a little butter and garlic salt on top. I've adapted the recipe a bit from the original, but it's near the same. If you like pesto, you're going to love this. Enjoy!
What you'll need:
- 3 1/3 cups of bread flour
- 2 tbsp of extra virgin olive oil
- 1 packet of fast-acting yeast
- 1 tsp salt
- 1 1/3 cups of warm water
- 2 tsp basil pesto
- 2 tsp sundried tomato pesto (I used Giada's; I found it at Target)
- 2 cloves of garlic, minced
- 1 egg beaten, for washing
Directions:
1. In your Kitchenaid bowl, combine the bread flour, oil, yeast, salt and about a cup of the warm water.
2. Using the dough hook on your KitchenAid mixer, stir until a loose dough begins to form. Add in the remaining water as the dough begins to form. If the dough appears too dry after you add in the water, add a little bit more; if it appears too wet, sprinkle in a little bit of flour. The dough should start pulling away from the side of the bowl and begin forming into a ball after 30 seconds or so.
3. When the dough forms into a ball, gradually increase the speed of your KitchenAid to medium. The dough ball should remain intact on the dough hook. If it's not hooking, turn your mixer off and help it hook and gradually increase the speed again. This happens to me, every so often. Otherwise let the mixer knead the dough on medium speed for 8 minutes. If you need to knead by hand, turn out the ingredients on a well-floured surface and knead for at least 10 minutes by hand.
4. While the dough is kneading, prepare a floured surface for the dough to rise on. Then, prepare a damp towel to cover the dough. I normally use a spray bottle to dampen my kitchen towel.
5. After 8 minutes, using floured hands, remove the dough from the hook and set it on the counter to rise. Use some olive oil to cover the top of the dough so it doesn't dry out while it rises. After that, cover the dough with the dampened tea towel and let the it rise for one hour.
6. When the dough is finished rising, split it into three equal boules. Work basil pesto into one section, sundried tomato pesto into the other and the minced garlic into the last.
7. Roll each section out into a long sausage. Make sure the sections are even and then braid them together. Pinch the ends to secure them for baking.
8. Put the bread on a baking tray, give it a light egg wash and let it rise for 30 more minutes.
9. In the meantime, preheat the oven to 350F. When the bread is finished rising, bake it for 30-35 minutes. The bread is finished when it's nice and golden and when it sounds hollow when tapped.
Enjoy the bread with some melty butter and garlic salt. Yum, yum!
Guys, guess what? I was more intentional about taking pictures this time! Yahoo. I hope these are helpful!
Now, onto the bread. I found this bread recipe when I was researching Nudo olive oil back in December. I fell in love with it and couldn't wait to bake it. It's a pretty normal dough recipe (very similar to my pizza dough, so the directions will be the same at first), but it splits the bread into three sections after its rise time and calls for you to work basil pesto into one section, sundried tomatoes into another and fresh, pressed garlic into another. Then you braid the pieces together to bake them. This bread is pretty heavenly, especially hot, out of the oven with a little butter and garlic salt on top. I've adapted the recipe a bit from the original, but it's near the same. If you like pesto, you're going to love this. Enjoy!
What you'll need:
- 3 1/3 cups of bread flour
- 2 tbsp of extra virgin olive oil
- 1 packet of fast-acting yeast
- 1 tsp salt
- 1 1/3 cups of warm water
- 2 tsp basil pesto
- 2 tsp sundried tomato pesto (I used Giada's; I found it at Target)
- 2 cloves of garlic, minced
- 1 egg beaten, for washing
Directions:
1. In your Kitchenaid bowl, combine the bread flour, oil, yeast, salt and about a cup of the warm water.
2. Using the dough hook on your KitchenAid mixer, stir until a loose dough begins to form. Add in the remaining water as the dough begins to form. If the dough appears too dry after you add in the water, add a little bit more; if it appears too wet, sprinkle in a little bit of flour. The dough should start pulling away from the side of the bowl and begin forming into a ball after 30 seconds or so.
3. When the dough forms into a ball, gradually increase the speed of your KitchenAid to medium. The dough ball should remain intact on the dough hook. If it's not hooking, turn your mixer off and help it hook and gradually increase the speed again. This happens to me, every so often. Otherwise let the mixer knead the dough on medium speed for 8 minutes. If you need to knead by hand, turn out the ingredients on a well-floured surface and knead for at least 10 minutes by hand.
4. While the dough is kneading, prepare a floured surface for the dough to rise on. Then, prepare a damp towel to cover the dough. I normally use a spray bottle to dampen my kitchen towel.
5. After 8 minutes, using floured hands, remove the dough from the hook and set it on the counter to rise. Use some olive oil to cover the top of the dough so it doesn't dry out while it rises. After that, cover the dough with the dampened tea towel and let the it rise for one hour.
6. When the dough is finished rising, split it into three equal boules. Work basil pesto into one section, sundried tomato pesto into the other and the minced garlic into the last.
7. Roll each section out into a long sausage. Make sure the sections are even and then braid them together. Pinch the ends to secure them for baking.
8. Put the bread on a baking tray, give it a light egg wash and let it rise for 30 more minutes.
9. In the meantime, preheat the oven to 350F. When the bread is finished rising, bake it for 30-35 minutes. The bread is finished when it's nice and golden and when it sounds hollow when tapped.
Enjoy the bread with some melty butter and garlic salt. Yum, yum!
Guys, guess what? I was more intentional about taking pictures this time! Yahoo. I hope these are helpful!
| The rising dough in action. |
| Working in some pesto. My hands smelled like pesto all day today, by the way. |
| Rolling! |
| My sections after being rolled out. |
| The braiding process, the best part, in my opinion. It's not errday you get to braid bread. |
| My darling rising some more. |
| The finished product. Artsy pic, ta-da! *If I would have dropped that I would have eaten it off the floor. It's that delish.* |
Monday, December 9, 2013
Baking Sunday: Pizza Dough {With Herbs} using the KitchenAid
'Tis the season for...Advent, food, parties and many other things. I love this time of year. I love advent; I love celebrating; I love food; I love parties; I love people and family. The list could go on and on. I have been doing so much extra cooking lately, I hardly know where to begin or what to share with you! On Saturday night, I made some excellent stuffed mushrooms. I was really excited because I made the recipe up by going off of some awesome stuffed mushrooms I once had. It's great how your taste buds can lead you in the right direction sometimes, isn't it? Sunday, we followed suite with the rest of our village and stayed in due to icy roads, so I spent the morning listening to Church of the Resurrection Online and making Strawberry Napoleans for a "Sip and See." Then, last night, for Baking Sunday, Jenny and I made homemade pizza! Asbury was supposed to host an Advent Vespers Service, but cancelled it due to the ice. Last year, after the Advent Service, we ate with friends and it's one of my very favorite memories. This year, I decided the same tradition must be appropriate. So, Baking Sunday and the After-Advent-Service-Meal-Gathering collided. It was too good.
With that said, enjoy the pizza dough recipe below. This recipe is so versatile. I've made it so many times. Sometimes I make it plain; sometimes with garlic and herbs. My grandma has made it with wheat flour, by hand; I allow my Kitchenaid to do all the work. The thing I like most about it, though, is that you know exactly what's going into your dough. And, there's just something about bread that's intriguing to me. The world lives on bread, it's a simple food that we all have in common. I like to make my own because it makes me feel like I'm holding something in common with people around the globe. Is that weird? Maybe. I'm getting spiritual on you. Ok, really, enjoy the dough!
Recipe adapted from A Couple Cooks.
Homemade Pizza Dough (Makes two medium pizzas)
What you'll need:
1. In your KitchenAid bowl, combine flour, yeast, oil, salt, and about a cup of the warm water.
2. Using the dough hook on your Kitchenaid mixer, stir until a loose dough begins to form. Add in the remaining water as the dough begins to form. If the dough appears too dry after you add in the water, add a little bit more; if it appears too wet, sprinkle in a little bit of flour. The dough should start pulling away from the side of the bowl and begin forming into a ball after 30 seconds or so.
3. When the dough forms into a ball, gradually increase the speed of your KitchenAid to medium. The dough ball should remain intact on the dough hook. If it's not hooking, turn your mixer off and help it hook and gradually increase the speed again. This happens to me, every so often. Otherwise let the mixer knead the dough on medium speed for 8 minutes.
4. While the dough is kneading, prepare a floured surface for the dough to rise on. Then, prepare a damp towel to cover the dough. I normally use a spray bottle to dampen my kitchen towel.
5. When the dough is finished kneading, use floured-hands to remove the dough from the bowl. Divide the dough in half and form into two boules. Set them on the floured surface to rise. Rub a tiny bit of olive oil on top of each of the doughs so they don't dry out. Then, cover both boules with the damp cloth. Let the dough rise for 45 minutes - 1 hour. About 15 minutes into the rise time, preheat the oven to 500 F.
6. When the dough is finished rising, gently shape the dough into circles on pizza pans/stones. Do not overwork the dough.
7. Prepare the dough with your favorite toppings and cook for 6-8 minutes.
- I normally use an Airbake pizza pan (it has holes) and it cooks well on the top rack, and my normal pizza pan cooks better on the bottom rack, closer to the burner.
With that said, enjoy the pizza dough recipe below. This recipe is so versatile. I've made it so many times. Sometimes I make it plain; sometimes with garlic and herbs. My grandma has made it with wheat flour, by hand; I allow my Kitchenaid to do all the work. The thing I like most about it, though, is that you know exactly what's going into your dough. And, there's just something about bread that's intriguing to me. The world lives on bread, it's a simple food that we all have in common. I like to make my own because it makes me feel like I'm holding something in common with people around the globe. Is that weird? Maybe. I'm getting spiritual on you. Ok, really, enjoy the dough!
Recipe adapted from A Couple Cooks.
Homemade Pizza Dough (Makes two medium pizzas)
What you'll need:
- 3 cups of flour
- 1 packet (or two teaspoons) of highly active, fast rising yeast
- 1/2 Tablespoon of oil
- 1/4 teaspoon of salt
- 1 1/3 cups of warm water
- 1-2 cloves of garlic (depending upon preference and size of the clove)
- 1 teaspoon of dried basil
- 1 teaspoon of dried oregano
1. In your KitchenAid bowl, combine flour, yeast, oil, salt, and about a cup of the warm water.
2. Using the dough hook on your Kitchenaid mixer, stir until a loose dough begins to form. Add in the remaining water as the dough begins to form. If the dough appears too dry after you add in the water, add a little bit more; if it appears too wet, sprinkle in a little bit of flour. The dough should start pulling away from the side of the bowl and begin forming into a ball after 30 seconds or so.
3. When the dough forms into a ball, gradually increase the speed of your KitchenAid to medium. The dough ball should remain intact on the dough hook. If it's not hooking, turn your mixer off and help it hook and gradually increase the speed again. This happens to me, every so often. Otherwise let the mixer knead the dough on medium speed for 8 minutes.
4. While the dough is kneading, prepare a floured surface for the dough to rise on. Then, prepare a damp towel to cover the dough. I normally use a spray bottle to dampen my kitchen towel.
5. When the dough is finished kneading, use floured-hands to remove the dough from the bowl. Divide the dough in half and form into two boules. Set them on the floured surface to rise. Rub a tiny bit of olive oil on top of each of the doughs so they don't dry out. Then, cover both boules with the damp cloth. Let the dough rise for 45 minutes - 1 hour. About 15 minutes into the rise time, preheat the oven to 500 F.
6. When the dough is finished rising, gently shape the dough into circles on pizza pans/stones. Do not overwork the dough.
7. Prepare the dough with your favorite toppings and cook for 6-8 minutes.
- I normally use an Airbake pizza pan (it has holes) and it cooks well on the top rack, and my normal pizza pan cooks better on the bottom rack, closer to the burner.
Monday, November 18, 2013
Baking Sunday: Pumpkin Spiced Scones
Yesterday was a rainy, cold Sunday in Wilmore. Baking was the perfect remedy -- the best indoor activity. As my friend, Anna Chua, says: "Baking is always more enjoyable on Sundays." I think I agree. With Thanksgiving ahead, the season of pumpkin everything is slowly drawing to a close. So, Jenny and I decided to make pumpkin spiced scones and take advantage of the season.
Let me start by saying that these scones are incredibly fantastic. Really. I'm not a pumpkin pie person (unless it has a lot of whipped cream), but I enjoy other, subtle, pumpkin-y things. These hit the spot. And I love how versatile they are. You can eat them for breakfast, a snack or dessert; or have them with some tea or milk. They're just that good. I'm thinking of making them again the week of Thanksgiving since we have friends visiting. And I might even make them after that for a baby shower. So, enjoy this recipe just in time for Thanksgiving gatherings.
This recipe is courtesy of Joanne and Adam Gallagher from inspiredtaste.net. We changed a few things within the recipe, which I've noted below. Enjoy!
What you'll need for the scones:
2 cups of all-purpose flour
1/3 cup of brown sugar
1 teaspoon of baking powder
1/2 teaspoon of baking soda
1/2 teaspoon of salt
1 teaspoon of ground cinnamon
3/4 teaspoon of ground ginger
3/4 teaspoon of ground cloves
1/2 teaspoon of ground nutmeg
1/2 cup of cold, unsalted butter, cut into pieces (1 stick)
1/2 cup pure pumpkin
1 tablespoon of unsulphured molasses (you can go without, if need be or try substituting with a little more brown sugar or honey)
1 egg
3 tablespoons of half and half
2 teaspoons of vanilla
For sugar glaze:
1 cup of powdered sugar
1-2 tablespoons of half and half (we used around 2 tablespoons)
For pumpkin spice glaze: (I cut this recipe in half from the original, you just don't need it all, double it if you think you'll want more.)
1/2 cup of powdered sugar
1/2 tablespoon of pure pumpkin
Dash of cloves
Dash of nutmeg
Dash of ginger
1/8 teaspoon of cinnamon
1 tablespoon of half and half
*Technically, you only need about 1/16 of a teaspoon of cloves, nutmeg and ginger. I just sprinkled some of each across the top.
To Bake:
Heat the oven to 400 degrees and spray a large baking sheet with non-stick cooking spray.
In a large bowl, whisk flour, brown sugar, baking powder, baking soda, salt and all the spices together. Then, add the cold, cut butter to the mixture. Use a pastry blender or two knives to cut the butter into the mixture until it resembles coarse cornmeal or crumbs.
In a separate medium bowl whisk together the pumpkin, molasses, half and half, vanilla and egg. Whisk until blended well.
After that, stir the pumpkin mixture into the flour/butter mixture and stir with a spoon until a soft dough forms.
After that, transfer the dough to a floured surface and knead it until it comes together. Pat the dough out into a 10x7 inch rectangle. Then, you can either make 8 regular sized scones or 12 smaller scones. We made 8 regular sized scones. To do that, cut the dough in half both lengthwise and width-wise to make four smaller rectangles. Then, cut the rectangles into triangles (making 8 scones).
To make 12 smaller scones, cut the dough in half lengthwise. Then, cut the the dough twice width-wise, so you have six small rectangles. Then, cut those rectangles into two triangles. Voila.
Make sure your baking sheet is sprayed, transfer the scones over and bake for 10-15 minutes. Ours were done in 10 minutes. You can insert a toothpick in the middle of one of the scones to make sure they are finished. Transfer the scones to a wire rack to cool.
While the scones cool, make one or both glazes (We made both!).
For the Sugar Glaze:
Add powdered sugar to medium bowl and add one tablespoon of half and half. Judge the consistency. If it's too thick, add more half and half (we used around 2 tablespoons). The glaze should be set when it slowly drizzles off the spoon.
When the glaze is finished, ice the top of each scone (using a spoon, or the like). Then, let the glaze set while you make the pumpkin glaze.
For the Pumpkin Spice Glaze:
Combine powdered sugar, pumpkin and spices. Then, add in the half and half. Stir and judge the consistency. The glaze should be set when it slowly drizzles off the spoon.
When the glaze is finished, use a spoon to drizzle the pumpkin glaze over the scone in a zig-zag pattern.
Last of all, let the scones cool and set for a few minutes and enjoy! They are delicious warm.
Let me start by saying that these scones are incredibly fantastic. Really. I'm not a pumpkin pie person (unless it has a lot of whipped cream), but I enjoy other, subtle, pumpkin-y things. These hit the spot. And I love how versatile they are. You can eat them for breakfast, a snack or dessert; or have them with some tea or milk. They're just that good. I'm thinking of making them again the week of Thanksgiving since we have friends visiting. And I might even make them after that for a baby shower. So, enjoy this recipe just in time for Thanksgiving gatherings.
This recipe is courtesy of Joanne and Adam Gallagher from inspiredtaste.net. We changed a few things within the recipe, which I've noted below. Enjoy!
What you'll need for the scones:
2 cups of all-purpose flour
1/3 cup of brown sugar
1 teaspoon of baking powder
1/2 teaspoon of baking soda
1/2 teaspoon of salt
1 teaspoon of ground cinnamon
3/4 teaspoon of ground ginger
3/4 teaspoon of ground cloves
1/2 teaspoon of ground nutmeg
1/2 cup of cold, unsalted butter, cut into pieces (1 stick)
1/2 cup pure pumpkin
1 tablespoon of unsulphured molasses (you can go without, if need be or try substituting with a little more brown sugar or honey)
1 egg
3 tablespoons of half and half
2 teaspoons of vanilla
For sugar glaze:
1 cup of powdered sugar
1-2 tablespoons of half and half (we used around 2 tablespoons)
For pumpkin spice glaze: (I cut this recipe in half from the original, you just don't need it all, double it if you think you'll want more.)
1/2 cup of powdered sugar
1/2 tablespoon of pure pumpkin
Dash of cloves
Dash of nutmeg
Dash of ginger
1/8 teaspoon of cinnamon
1 tablespoon of half and half
*Technically, you only need about 1/16 of a teaspoon of cloves, nutmeg and ginger. I just sprinkled some of each across the top.
To Bake:
Heat the oven to 400 degrees and spray a large baking sheet with non-stick cooking spray.
In a large bowl, whisk flour, brown sugar, baking powder, baking soda, salt and all the spices together. Then, add the cold, cut butter to the mixture. Use a pastry blender or two knives to cut the butter into the mixture until it resembles coarse cornmeal or crumbs.
In a separate medium bowl whisk together the pumpkin, molasses, half and half, vanilla and egg. Whisk until blended well.
After that, stir the pumpkin mixture into the flour/butter mixture and stir with a spoon until a soft dough forms.
After that, transfer the dough to a floured surface and knead it until it comes together. Pat the dough out into a 10x7 inch rectangle. Then, you can either make 8 regular sized scones or 12 smaller scones. We made 8 regular sized scones. To do that, cut the dough in half both lengthwise and width-wise to make four smaller rectangles. Then, cut the rectangles into triangles (making 8 scones).
To make 12 smaller scones, cut the dough in half lengthwise. Then, cut the the dough twice width-wise, so you have six small rectangles. Then, cut those rectangles into two triangles. Voila.
Make sure your baking sheet is sprayed, transfer the scones over and bake for 10-15 minutes. Ours were done in 10 minutes. You can insert a toothpick in the middle of one of the scones to make sure they are finished. Transfer the scones to a wire rack to cool.
While the scones cool, make one or both glazes (We made both!).
For the Sugar Glaze:
Add powdered sugar to medium bowl and add one tablespoon of half and half. Judge the consistency. If it's too thick, add more half and half (we used around 2 tablespoons). The glaze should be set when it slowly drizzles off the spoon.
When the glaze is finished, ice the top of each scone (using a spoon, or the like). Then, let the glaze set while you make the pumpkin glaze.
For the Pumpkin Spice Glaze:
Combine powdered sugar, pumpkin and spices. Then, add in the half and half. Stir and judge the consistency. The glaze should be set when it slowly drizzles off the spoon.
When the glaze is finished, use a spoon to drizzle the pumpkin glaze over the scone in a zig-zag pattern.
Last of all, let the scones cool and set for a few minutes and enjoy! They are delicious warm.
Monday, November 11, 2013
Baking Sunday: White Chocolate Bread Pudding
This past Sunday, Jenny and I made White Chocolate Bread Pudding for Baking Sunday. It was delicious. After we made it, though, Jenny noted that it's one of those desserts that you order at a restaurant and never worry about asking what's in it. Because, my fellow bakers and readers, there's a lot of heavy cream. I mean, like, a lot. That's what makes it so delicious and pretty rich. So, if you're going to splurge on dessert during the holidays, I would recommend this White Chocolate Bread Pudding. Enjoy!
An overview of what you'll need:
- 18 ounces of quality white chocolate chips (about a bag and a half)
- 3 cups of milk
- 1 quart of heavy cream (1/2 quart to be used for the pudding and 1/2 a quart to be used for the white chocolate sauce)
- 1 cup of sugar
- 5 eggs, well beaten
- 2 loaves of french bread, cubed
- Begin by preheating the oven to 300 degrees.
- Cube both bread loaves. When finished, place cubes in a greased 9x13 baking dish.
- Next, place 12 oz. of white chocolate chips in large bowl and set it aside.
- Then, in a large saucepan, over medium heat, mix the milk, 1/2 quart of cream and sugar. Bring it to a gentle boil and then pour the mixture over the white chocolate chips in the large bowl. Let the mixture sit for about a minute and then whisk until smooth.
- Add the eggs to the mixture and mix well.
- When finished, pour the white chocolate mixture over the cubed bread.
- Cover the baking dish with aluminum foil and bake for 1 - 1 1/2 hours, until the center is set.
- While the bread pudding cools, place 6 oz. of white chocolate chips in a separate medium bowl.
- In a sauce pan, bring the remaining 1/2 quart of cream to a gentle boil. Then, pour the cream over the white chips. Let set for about a minute and then whisk until smooth.
- Drizzle the white chocolate sauce over each individual serving of pudding when you're ready to serve.
Monday, November 4, 2013
Baking Sunday: Blueberry Cream Cheese Coffee Cake
It all started about a month ago during a nonchalant conversation with a sweet friend, Jenny, at Asbury. We were chatting in-between our intramural volleyball games about baking. I knew that she enjoyed baking and I said that we should get together to bake sometime. She informed me that, during college, her and her roommates used to spend the majority of their Sundays cooking, baking and enjoying meals/desserts together. They entitled this day, "Baking Sunday." I became wrapped up in the idea of it all and a few weekends later, Baking Sunday commenced in Wilmore. It's as simple as that. So, I thought it would be fun to share some recipes from Baking Sunday. Maybe you can start this in your neck of the woods, too. It's such a fun activity to do with friends on a relaxing Sunday, if you enjoy cooking/baking, that is.
Last weekend, Jenny and I baked some pretty amazing Strawberry Pie Sour Cream Crumb Bars. I was slacking on Instagram last weekend, so I have no pictures. But, the recipe can be found here. Thanks, Pinterest. And, thanks, Jenny. Who also happens to be a Pinteresting Queen.
This weekend, Jenny was gone so I invited Anna Chua into this adventure and we made one of her family's favorite dessert recipes: Blueberry Cream Cheese Coffee Cake (we're into making desserts with long names, I guess). This is the recipe many of you have asked for. So, enjoy! P.S. Credit is all due to Anna -- thanks for the recipe AC!
Next Baking Sunday's plan is White Chocolate Bread Pudding, I think. I guess we'll see.
Blueberry Cream Cheese Coffee Cake
yields: 9 servings
Coffee Cake:
- 1 package Pillsbury Blueberry quick bread and muffin mix
- 3/4 cup of water
- 1/3 cup of oil
- 2 eggs
Topping:
- 1 8oz package of cream cheese
- 1 cup of sugar
- 1 tablespoon of milk
- 1/2 teaspoon of vanilla or grated lemon peel
Directions:
1. Preheat oven to 375. Grease an 8x8 or 9x9 square pan. In a medium bowl, combine quick bread mix, water, oil and eggs. Beat 50-75 strokes until well mixed.
2. Rinse and drain blueberries and fold into the batter. Pour batter into greased pan.
3. In a medium bowl, blend cream cheese, sugar, milk and vanilla until smooth (with hand-held beaters or a mixer). Dollop spoonfuls of the blended mixture across top of the batter. Swirl by running a knife across the cream cheese and batter.
4. Bake at 375 until topping is golden and a toothpick inserted into the cake comes out clean. Bake an 8x8 inch pan for 35-45 min. Bake a 9x9 inch pan for 30-40 min. Cool 15 minutes and serve warm. Store leftovers in the refrigerator.
Last weekend, Jenny and I baked some pretty amazing Strawberry Pie Sour Cream Crumb Bars. I was slacking on Instagram last weekend, so I have no pictures. But, the recipe can be found here. Thanks, Pinterest. And, thanks, Jenny. Who also happens to be a Pinteresting Queen.
This weekend, Jenny was gone so I invited Anna Chua into this adventure and we made one of her family's favorite dessert recipes: Blueberry Cream Cheese Coffee Cake (we're into making desserts with long names, I guess). This is the recipe many of you have asked for. So, enjoy! P.S. Credit is all due to Anna -- thanks for the recipe AC!
Next Baking Sunday's plan is White Chocolate Bread Pudding, I think. I guess we'll see.
Blueberry Cream Cheese Coffee Cake
yields: 9 servings
Coffee Cake:
- 1 package Pillsbury Blueberry quick bread and muffin mix
- 3/4 cup of water
- 1/3 cup of oil
- 2 eggs
Topping:
- 1 8oz package of cream cheese
- 1 cup of sugar
- 1 tablespoon of milk
- 1/2 teaspoon of vanilla or grated lemon peel
Directions:
1. Preheat oven to 375. Grease an 8x8 or 9x9 square pan. In a medium bowl, combine quick bread mix, water, oil and eggs. Beat 50-75 strokes until well mixed.
2. Rinse and drain blueberries and fold into the batter. Pour batter into greased pan.
3. In a medium bowl, blend cream cheese, sugar, milk and vanilla until smooth (with hand-held beaters or a mixer). Dollop spoonfuls of the blended mixture across top of the batter. Swirl by running a knife across the cream cheese and batter.
4. Bake at 375 until topping is golden and a toothpick inserted into the cake comes out clean. Bake an 8x8 inch pan for 35-45 min. Bake a 9x9 inch pan for 30-40 min. Cool 15 minutes and serve warm. Store leftovers in the refrigerator.
Subscribe to:
Posts (Atom)